How to Machine Glass With Almost Any CNC Router?
Glass engraving is a prevalent yet strangely unconventional activity even in 2021. We see glasses in our daily lives, and most of the time, we never wonder how they got such elegant engravings and designs. Well, the individuals who spend extensive work etching the glass know.
Etching glass can be tricky, given its delicate nature and the complexity of the design. However, names like CNC machines have simplified the process for many around the globe. Many professional workshops and individuals choose CNC routers for glass engraving since the machines can deliver every unique manufacturing need.
CNC designs these machines to offer a better cut experience and improve the overall operational efficiency. If we ask anyone who has worked with them before, they will openly recommend CNC routers’ ease of use and flexibility. But why routers and not the lasers?
Although we can use CNC lasers for excellent glass etching, its cost can repel most users. In addition, we can easily find a CNC turning center in most regions, making CNC routers the best choice for most.
However, even with such widespread acclamation, many find it tough to machine glass or look for a better method. That is why we have curated an extensive guide to steer you through the process. It does not matter what CNC router we own; the method will apply to most of them.
Why CNC Routers?
Although we have stated how many find CNC routers easy-to-use, they offer even more benefits that put them above the rest. Since CNC routers integrate CAD software, we can easily cut through hard glasses to create precise designs. It reduces operational costs and increases profit margins as we reduce material wastage. Even if we need to work on limited glasses, CNC routers eliminate the need for human resources.

Its support for 30+ materials is another primary reason why we love it. Whether wood, plastic, foam, acrylic, or glass, we can get the desired design on any surface. With minimal human intervention comes utmost safety and precision.
And the most important of them all, the liberty to create the desired piece. We can change or modify the router to suit any demand and cater to multiple sectors. Plus, we can easily update these routers without getting any new physical equipment. With the demand for CNC routers increasing, we can get them at affordable prices as well.
Things to Consider Before Engraving
We can always opt for a turning center to know crucial aspects of glass engraving. But here are some of the fundamental ones everyone should consider.
Choosing Fixed Materials and Routing Bits
Although we can get a decent glass etching from any CNC router, choosing the ideal fixed materials and bits elevates the quality. For example, we cannot use wood cutting heads for high-quality engraving as clip removal are pivotal.
Set Feed Rate
Choosing the ideal feed rate for machine glass is crucial for the best performance. We can shift the rate between 75 to 300 IPM, but it mostly depends on the router bit size. For a 200-300 IPM range, choosing ½* route bits fit perfectly. Contrarily, 75-200 IPM range means we need a 1/8* route bit.
Choose RPM
RPM also depends on the router bits, and generally, tough glass requires around 25,000 RPM. Choosing a higher RPM means we also need to raise the feed rate.
Set Cut Depth
The standard guideline for the perfect cut is half the diameter of the router bit. Thus, it avoids breaking the glass and delivers the ideal cut.
How to Engrave Glass With CNC Routers?
The process starts with acquiring the essentials, i.e., a glass pane, plastic box, construction paper, engraving bit, CNC router, etc. Here we have mentioned two instances – one with a small piece of glass and engraving, and vice versa.
For both methods, we need first to program the machine. Then, we can choose from many options like CNC G and M codes, Syntax, Tool Radius Compensation, etc. There’s a detailed article on G codes and M codes of CNC and an explanation of commonly used CNC codes. Learning G-Code is not essential for CNC turning, but doing so can be a bonus.
Nonetheless, we can create a program for CNC in any text application. After typing the code, we need to save the file in .gcode or .nc format. Although we can use other extensions, these are the most popular ones. Afterward, we must load the file in the CNC software and run it.
Must Read:
What is meant by 3, 4, 5 and 6 axes CNC machining?
What is Ultrasonic machining and how does it work?
How to Create the Code on Different Platforms?
For CNC Phrases, We Can Use Commands Like:
- G0: For moving to a particular specific point at full speed.
- G1: For cutting a straight line.
- G2: For etching a clockwise arc.
- G3: For cutting a counter-clockwise arc.
- G40: For cutting right below the line’s center.
- G41: For cutting to line’s left via the tool’s radius.
- G42: For cutting to the line’s right of the line via the tool’s radius.
- G20/G21: The former mentions coordinates in inches and the latter in millimeters.
For Syntax, the Basic Codes Will Be:
- G1 X3 Y0: For cutting a straight line ending at 3′ in the X-axis and 0′ in Y.
- G0 X10 Y0: For moving at full speed to 10′ on X-axis and 0′ in Y.
- G1 X15 Y15: For cutting a straight line that ends at 15′ in the X-axis and 15′ in Y.
- G2 X1 Y1 R0.5: For cutting a clockwise arc with a ½’ radius that ends at 1′ in the X-axis and 1′ in Y.
Not every command matches the same parameters, so we have to add extra parameters in some cases. However, we can easily get the dimensions for the design after placing the glass between the router and the grid.
For Tool Radius Compensation, the Basic G Codes Will Be:
If our router bit is centered over the X and Y dimensions, we will get a smaller cut than specified. If that happens, we can fix it using the G41 or 42 commands. It initiates the tool radius compensation, fixing the G-Code. Here is how we can do it:
- G41 P0.125: The code compensates for the radius of the router bit. It cuts 1/8′ towards the left of the mentioned X and Y dimensions.
- G42 P0.125: Similarly, the code also compensates for the radius of the router bit. However, it cuts 1/8′ towards the right of the mentioned X and Y dimensions.
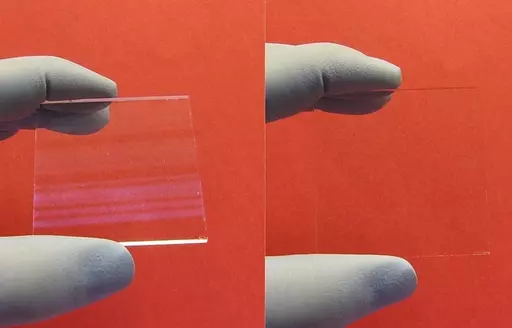
Engraving on a Small Glass
For a small piece of glass, we merely need a handful of items like a plastic box, placement screws, and of course, a router. We will use a 2mm DIA tool with a diamond drag bit to get the best result.
Now, cover the workstation with a plastic sheet. It will eliminate the chances of any unneeded mess and splatter. After that, we need to place the plastic or wood box on a table. We will put a hardcover at the bottom of the box to keep the glass stationery.
Put the glass in the box, and use some screws to stabilize the glass. Fill the box with water, but keep the water level below the glass. Program the router with the required etching, and let it run over the glass.
We will keep a distance from the box and wait until the router hovers above the glass. Once the design is processed, wait 2-3 minutes before picking up everything. Finally, remove the screws and wash the glass to see the desired engraving.
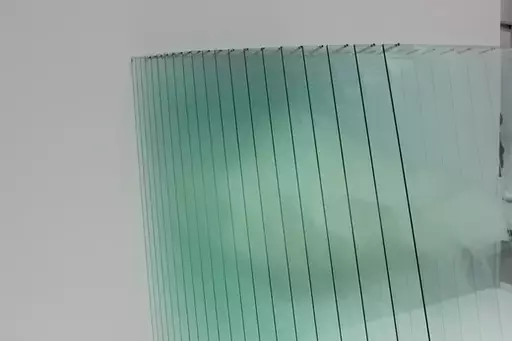
Engraving on a Medium-Sized Glass
Start the process by taking off the dust shoe, if any, and clean up the machine as well as the glass. Then, we can place the glass over the dark paper and cut it down to match the glass dimension. The paper ensures that we can see the glass throughout the process.
Before proceeding, we should ensure that the router comes with a grid. A grid ensures that we can set up the parts in specific locations. The dimension of the grid can vary depending on the size of the glass, engraving, and router.
The crucial thing is to ensure we know the grid’s placement throughout the process. Now, we will place the construction paper below the glass and carefully place it over the grid. Again, we need to stabilize the glass with some wood screws without pushing down the glass.
For the next step, we will select a drag bit. Its quality and degree of drag bit depend on preferences, but 90 or 120-degree bits work perfectly. After placing the bit into the machine, we will set it gently on the glass. It is not where we start the router, as we have to remove it.
Now, we see the markings on the grid, which will be used to denote the G-Code. We need to input the codes into the program and double-check it before starting the etching. Install the program with the design and let it process. Now, we will wait until the design is etched on the glass.
Conclusion
Glass engraving seems like a daunting process, but it can be simplified with some knowledge and practice. With the help of CNC routers and some basic understanding of G-Code, etching sophisticated designs over a thick glass becomes a routine job.
We have mentioned two scenarios to engrave designs on glass, which will be viable under most scenarios. However, use the pointers carefully and always check the machines before putting glass under them.

Vincent Hua
Vincent Hua is the Marketing Manager at TSINFA. He is passionate about helping people understand high-end and complex manufacturing processes. Besides writing and contributing his insights, Vincent is very keen on technological innovation that helps build a highly precise and stable CNC Machinery.

![37 Must Have Workshop Tools & Their Uses with [PDF & Images]](https://mechanicalpost.site/wp-content/uploads/2023/07/tool-stoarge.webp)